The Vistal stone is a water whetstone and you should not use oil. Oil can clog the stone. The water acts as the lubricant to carry the grit and metal away. As the stone wears, new grit is exposed. The stone can be used and flattened for years before needing to be replaced.
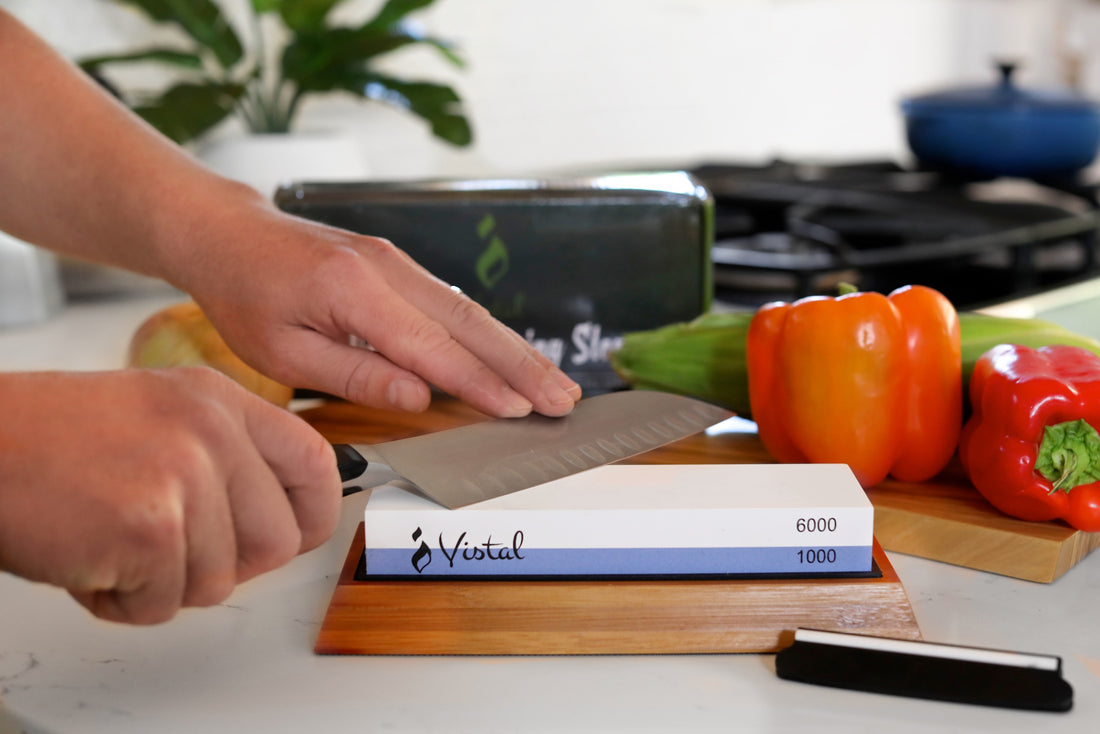
The 1000 grit is a good grit for creating the proper angle on the blade and removing any nicks in the blade. The 6000 grit is used to smooth out the scratches left by the 1000 grit and polish the cutting surface. The 1000 grit is courser (larger grains) than the 6000 grit. These two grits are probably the only grits you will ever need to sharpen your knives. There are finer grits, but they are not usually necessary. A 6000 grit is fine enough to get a blade to the point of being able to shave the hair off your arm or slice very fine translucent cucumber slices for your salad.
The beauty of learning to sharpen is that you can sharpen any knife or tool, high or low quality, and get great results. The same principals apply to all your tools around the house like scissors, clippers, axes, even drill bits. At the end of the day, it is just steel with an edge. Better steel provides a better, longer lasting edge. The following instructions are for kitchen knives.
Step One – Stone Preparation and placement
Run water over or soak the stone for a few minutes before use. Longer is better; however, any more than 10 minutes is not necessary.
Place the stone on a flat surface, at counter height so you can run the knife up and down the stone from both sides. The exact placement comes from feel. Once you have sharpened a few knives, you will develop a feel for the angle and cutting. It is a lot like cutting vegetables, you just need to practice it and you get better.
Start sharpening with the 1000 grit to establish the cutting edge at the angle you want (see below). You will then finish sharpening with the 6000 grit to establish a smooth polished cutting edge.
Step Two – Select the proper angle.
For most kitchen knives, a 15 to 20 degree bevel will work. A lower angle cuts easier but a steeper angle is more durable. A guide is provided with the stone that will help you in finding the right angle. It works with standard 10 or 12 inch chef knives. It won’t work with small knives.
Tip: The human eye is very good at splitting things in half, so you can take a right angle and split it in half to get 45°. Then you split that in half again to get 22.5°. Then lower the knife a little more and you are between 15° and 20°. Your body will learn the angle instinctively. The angle is not as important as your ability to be consistent as you sharpen.
Step Three – Sharpening
You will be moving the knife back and forth along the knife at about a 45° to 70° angle as shown below. Find an angle that is comfortable for you. As the sharpening progresses, the stone will need to be lubricated. A good way to add water is to dip your fingers in water and add drops of water on the stone. This provides about the right amount. Leave the slurry (the muddy residue the develops) on the stone as you sharpen.
Just like learning to drive a car, it will be awkward at first but over time you will do it without even thinking about it. There are some great videos on the internet. I recommend watching sushi chefs sharpen knives. Some of them are true masters. Carter Cutlery in Oregon is another great resource on sharpening. There is a great video of him sharpening a pair of scissors and then shaving with them. Good stuff for the sharpening geeks out there.


Move the knife back and forth along the stone making sure to not change the angle of the knife as you go. Put pressure on the blade as you draw it to you and let up as you move away. You can actually sharpen in both directions, but it takes awhile to get consistent in both directions.
Tip: I prefer to pull the knife towards me with the 1000 grit and push it away with the 6000 grit. It is more forgiving when you push it verses pull it.
You will feel a burr develop as you sharpen (see below). Only move your finger perpendicular to the blade as shown in the picture, because you will cut your finger if you move it parallel (along) the blade. Once you have raised a burr along the whole blade, flip the blade over and do the other side. Once you have a burr all along the second edge, move to the 6000 grit.


Using the same angle, polish the cutting edge with the 6000 grit. It is the same action as with the 1000 grit. Start with the same pressure as with the 1000 grit and apply lighter and lighter pressure with the 6000 grit as you progress. This will result in no burr on the final edge. The cutting edge should appear as a thin mirrored edge. The finer grit will remove the scratches left by the 1000 grit. It is the same concept as sanding wood or polishing stones.
Step Four – Test Blade for Sharpness
There are a couple different ways to check the sharpness of your blade. A very common technique is to cut through paper and see if cuts cleanly or grabs the paper. Another is to develop a feel with your fingertips. Your fingers have an amazing ability to detect sharpness. Be careful to only push on the blade lightly. If you drag your fingers along the blade you will get cut!
You can strop the blade (final polishing) by placing a sheet of newspaper over the stone and pushing the knife across the stone (pushing the knife away from you with the sharp side towards your body. This step is not necessary but is fun to get the blade scary sharp.
Most of all have fun. Enjoy the new skill you have and the joy of using a truly sharp knife.